Create and Deploy LINE Chatbot with Heroku
Hello, in this tutorial I will explain how to create and deploy LINE Chatbot using NodeJS + Express and Heroku.

Hello, in this tutorial I will explain how to create and deploy LINE Chatbot using NodeJS + Express and Heroku. You can check my riddle game chatbot here. I also provide github source code at the end of this article.
Prerequisites
Before we start, we need tools and programs:
- NodeJS (download here)
- Git (download here)
- Heroku CLI (download here)
- Heroku Account (create one here)
- Line Business ID (create one here)
- IDE or Text Editor
Configuring Line Channel
If you already created a LINE Business Account, then the next step is to create LINE Provider here, put the provider name. After that, choose Create a messaging API Channel under Channel tab.
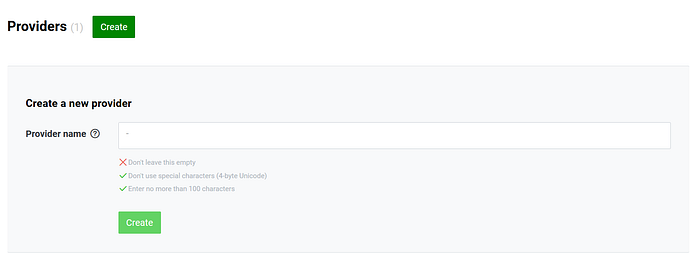
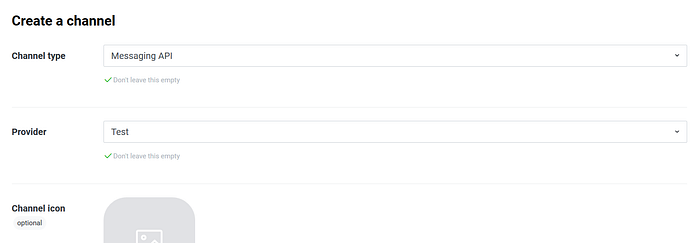
After filling all required fields, move to Messaging API tab, then go to Webhook Settings. According to LINE Messaging API Documentation, any event that is performed by LINE user will be sent to Webhook URL. We will fill this URL later with our server URL (in our case, we use Heroku).
Build NodeJS App
Let's continue to building our app with NodeJS. Create an empty directory or folder with name chatbot-tutorial, then open it in VSCode like this.
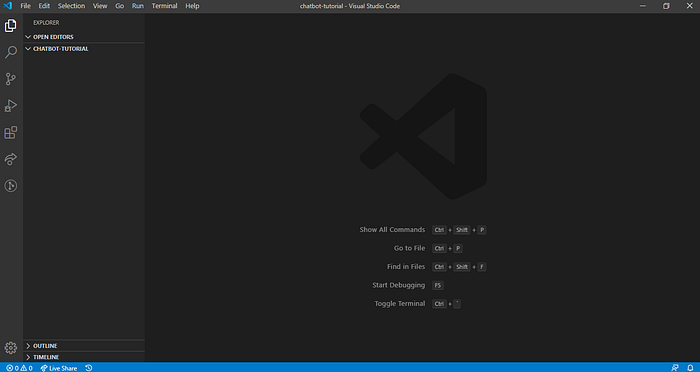
create empty git repository and new package.json file in command line:
git init
npm init
Because we will build API, load environment variables, and communicate with LINE Messaging API, then we will install express, dotenv and LINE Bot SDK:
npm install express
npm install dotenv
npm install @line/bot-sdk
First, we will create .env file under chatbot-tutorial directory and put environment variables:
LINE_CHANNEL_ACCESS_TOKEN = 'YOUR CHANNEL ACCESS TOKEN'
LINE_CHANNEL_SECRET = 'YOUR CHANNEL SECRET'
PORT = 5000
I will explain how to get these environment variables:
- LINE_CHANNEL_ACCESS_TOKEN can be acquired by opening Messaging API Tab in your LINE Channel. Remember, do not share your access token.
- LINE_CHANNEL_SECRET can be acquired by opening Basic Settings Tab in your LINE Channel. Remember, do not share your channel secret.
- PORT is used to serve your app locally in your computer.
Under chatbot-tutorial directory, create new app.js file and create new express app:
require("dotenv").config();
const configuration = {
  channelAccessToken: process.env.LINE_CHANNEL_ACCESS_TOKEN,
  channelSecret: process.env.LINE_CHANNEL_SECRET,
};

const app = require("express")();
const line = require("@line/bot-sdk");
const client = new line.Client(configuration);

app.get("/", function (req, res) {
  res.status(200).send("Chatbot Tutorial");
});

app.post("/event", line.middleware(configuration), function (req, res) {
  req.body.events.map((event) => {
    client.replyMessage(
      event.replyToken,
      { type: "text", text: "Hello!" },
      false,
    );
  });
  res.status(200).send("Chatbot Tutorial");
});

app.listen(process.env.PORT);
Before continue to deployment, let's open package.json file and add start script like this:
// . . . .
"scripts": {
    "test": "echo \"Error: no test specified\" && exit 1",
    "start": "node app.js"
},
// . . . .
This is required by Node environment in Heroku because they will run your app using start script. If the script is missing, your app will crash.
Deploying App to Heroku
Next, we continue to deployment to Heroku so our app can be accessed from internet. First, login using Heroku CLI.
heroku login
Then create a project using Heroku CLI.
heroku create
This command allows us to create new project with a random name, and set up git remote to our heroku Git repository. You can check it by using this command:
git remote -v
Before pushing our app to Heroku Git repository, we can create .gitignore so git will ignore unnecessary directories and files. (optional)
After that, we will upload our code to heroku using Git.
git add .
git commit . -m 'First commit'
git push heroku master
Bonus: if you want to want to know what's happening in your server, type:
heroku open
Configure Webhook Settings
Now we already create and deploy our NodeJS app to server, last thing we have to do is to connect our channel webhook URL to our server URL. Note that LINE uses HTTP POST to send webhook events, so we can configure it like this:
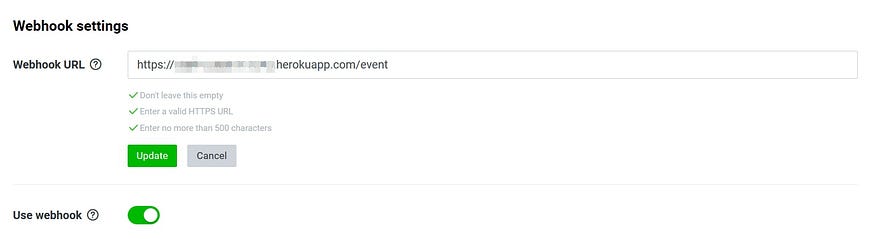
Enter your HTTP POST URL, then press Update. You can also verify the Webhook URL, in order to success we have to return HTTP STATUS 200 to every /events requests. And do not forget to turn on Use Webhook.
Now let's try our chatbot. You can add your Line Business App by scanning QR Code in Messaging API Tab.

That's all. Any comments or suggestions are welcome. Thanks for reading :)
Complete Source code: https://github.com/danielnathanael/chatbot-tutorial